Due to the strict COVID-19 policies in Australia, the BSides Canberra hacker conference was back in mid-April 2021. My visit was a good excuse to take my pwnagotchi for a walk in Canberra, and draw some conclusions of the Wi-Fi security practices of the Australian capital city.
For those not familiar with the pwnagotchi project, it makes Wi-Fi password auditing fun again. A pwnagotchi device is essentially bettercap installed on a Pi Zero, allowing to capture Wi-Fi packets on the go. The captured Wi-Fi packets are automatically uploaded to third-party services, and then analysed to reveal weak wireless passwords (PSKs) of the nearby wireless access points.
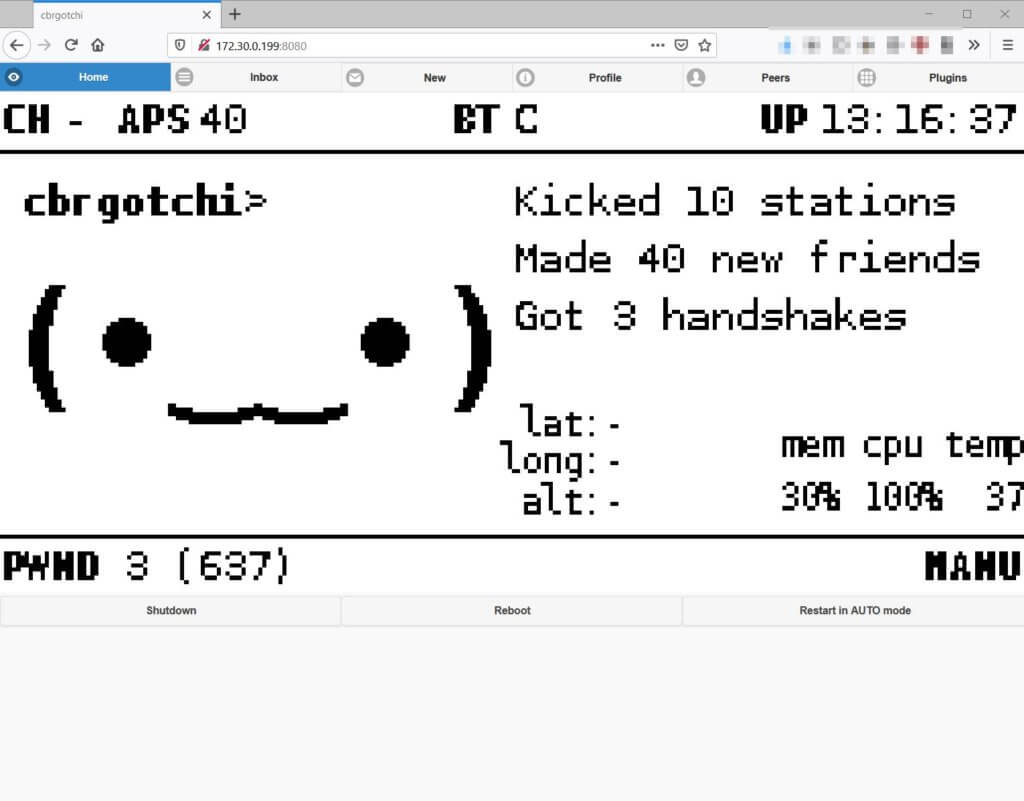
My pwnagotchi device I was carrying around in my backpack looked like this:
My configuration was a standard Raspberry Pi Zero W hooked up to a 10,000 mAh power bank. The battery pack was strong enough to power the pwnagotchi for 20-22 hours with a single charge.
While I spent two days in Canberra, the pwnagotchi device was capturing wireless handshakes nearby to identify wireless networks with weak pre-shared keys. My goal was to see how Wi-Fi owners fell short in 2021 when it comes to network security.
Installation
Unfortunately, the pwnagotchi project didn’t receive too much TLC recently as the main developer, evilsocket, moved on to other projects recently. I tried the official pwnagotchi release first, but I encountered a few annoying bugs I was not able to fix.
In the end, I chose the dadav/pwnagotchi fork, which is a bit more up-to-date than the original evilsocket/pwnagotchi repository.
As for May 2021, however, the last commit of the dadav/pwnagotchi fork is from December 2020. Although both the original project and the ‘dadav’ fork do not seem to be actively developed, but the ‘dadav’ fork has more patches, so I ended up using this one.
As for the basic pwnagotchi installation and the basic configuration, as they are well covered on the official website. Instead of repeating the installation steps, I am going to share my workarounds in the following sections.
Bug Fixes
First, I tried to run an ‘apt-get update’ on my dadav/pwnagotchi device, but it was complaining about an expired PGP key. The fix was to pull a fresh key with the following command:
# apt-key adv --keyserver keys.gnupg.net --recv-keys 11764EE8AC24832F
With the new PGP key, I was able to upgrade the software packages with apt-get upgrade to the latest versions.
Timekeeping
Be aware that the Pi Zero does not come with a hardware clock by default. As I did not have the recommended RTC hardware module for the Pi Zero (to prevent the internal clock go out of sync), I installed the lightweight Chrony NTP daemon to keep the clock accurate:
# apt-get install -y chrony
Back in the shell again, I changed the default timezone from the default BST to my local one:
# timedatectl set-timezone Australia/Sydney
Swap File
As the pwnagotchi tend to use a large amount of memory, I found the default swap file too small. To enlarge the swap space, I changed CONF_SWAPSIZE parameter to 500 megabytes in the /etc/dphys-swapfile file to keep my system happy.
CONF_SWAPSIZE=500
This setting requires the pwnagotchi to restart to take effect.
Bettercap issues
When the pwnagotchi is booted in Manual mode, the Bettercap Web UI becomes available on port 80. The bettercap UI allows to monitor Bettercap events, although I never ended up using it.
Unfortunately, the web GUI does not show the Bettercap events to a default (mis)configuration setting. My browser was complaining that the latest Bettercap events were not available.
To receive the latest Bettercap events, the fix is relatively easy. We need to turn the websockets settings off by changing the websocket setting to ‘false’ in the /usr/local/share/bettercap/caplets/pwnagotchi-manual.cap file:
set api.rest.websocket false
Handshake-collecting mode
By default, the pwnagotchi runs in Manual mode, which allows us to connect to Bettercap but it does not capture any Wi-Fi handshakes.
To force the pwnagotchi to go Auto/AI mode after reboot (required to start collecting Wi-Fi handshakes), create an empty, hidden file in the /root directory:
# touch /root/.pwnagotchi-auto
Remote access
There are two ways to connect to the pwnagotchi over a network:
- through the micro-USB cable; or
- over Bluetooth tethering.
In the first case, the Pi Zero is connected to a PC over USB such as a laptop. This scenario allows simple SSH access from the laptop to the Pi Zero over USB-over-Ethernet. Obviously, this makes it difficult to carry the pwnagotchi around, as the cable needs to be connected to a clunky device.
As for the Bluetooth option, the pwnagotchi can access the internet while it is powered by a power bank. The drawback is that this scenario does not allow any remote access while connected via Bluetooth.
Using Zerotier
I managed to have the best of both worlds by installing Zerotier. Zerotier a VPN-like service creating a local LAN over the internet connecting remote devices together. All I had to do is installing the Zerotier client on my pwnagotchi and on my laptop to have SSH when my pwnagotchi was connected to the internet via Bluetooth.
This setup allowed me to have the best of both worlds as I could:
- Sign in to the Pi Zero via SSH and view the dashboard while the device is connected to a power bank; and
- the pwnagotchi could still access to the internet to upload the Wi-Fi handshakes to OnlineHashCrack and wpa-sec.
I simply ran the Zerotier installer script on the pwnagotchi, then joined my private network:
# curl -s https://install.zerotier.com/ | bash
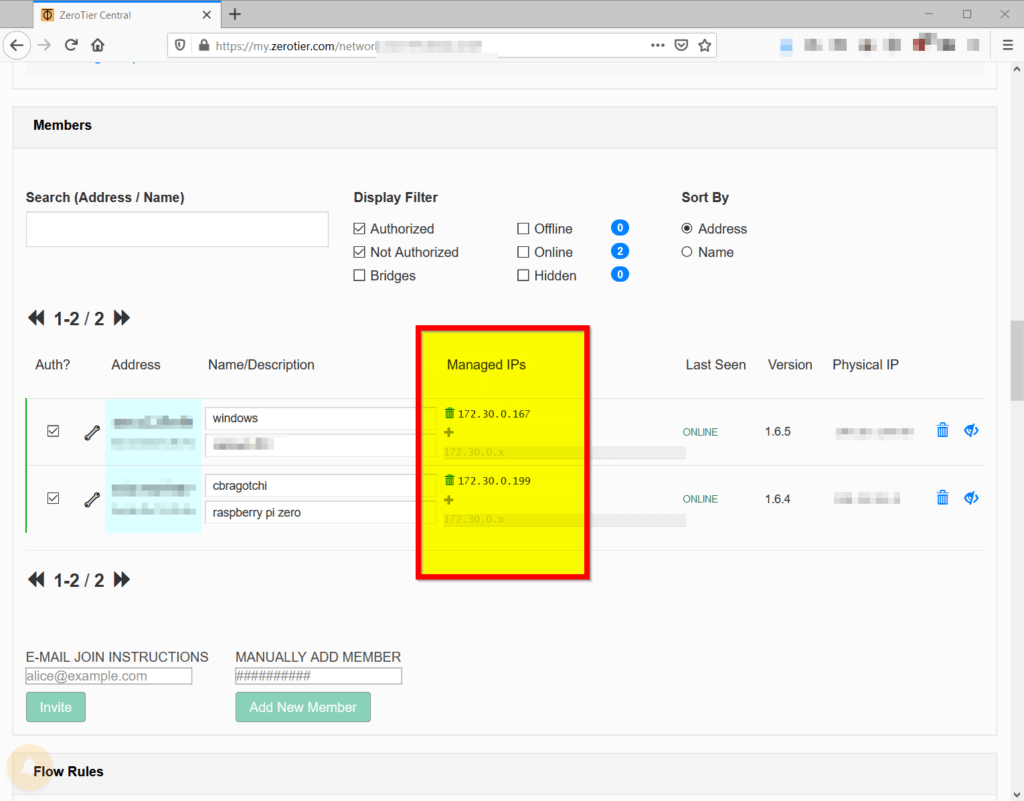
Once my pwnagotchi and my laptop were connected to the Zerotier network, I was able to remove the USB link between the computer and the Pi Zero. I could simply SSH into the Pi Zero by connecting to the assigned 172.30.x.x IP address on pwnagotchi. In parallel, the pwnagotchi device was connected to the internet through my personal hotspot over Bluetooth.
Beside having SSH access, the main pwnagotchi dashboard is also available on the Zerotier address:
Hardware Temperature
On a related note, it is worthwhile monitoring the hardware temperature when the pwnagotchi is stuffed away in a backpack, as the Pi Zero tends to get hot in poorly-ventilated areas. The temperature value is also available from the command-line over SSH:
# /opt/vc/bin/vcgencmd measure_temp
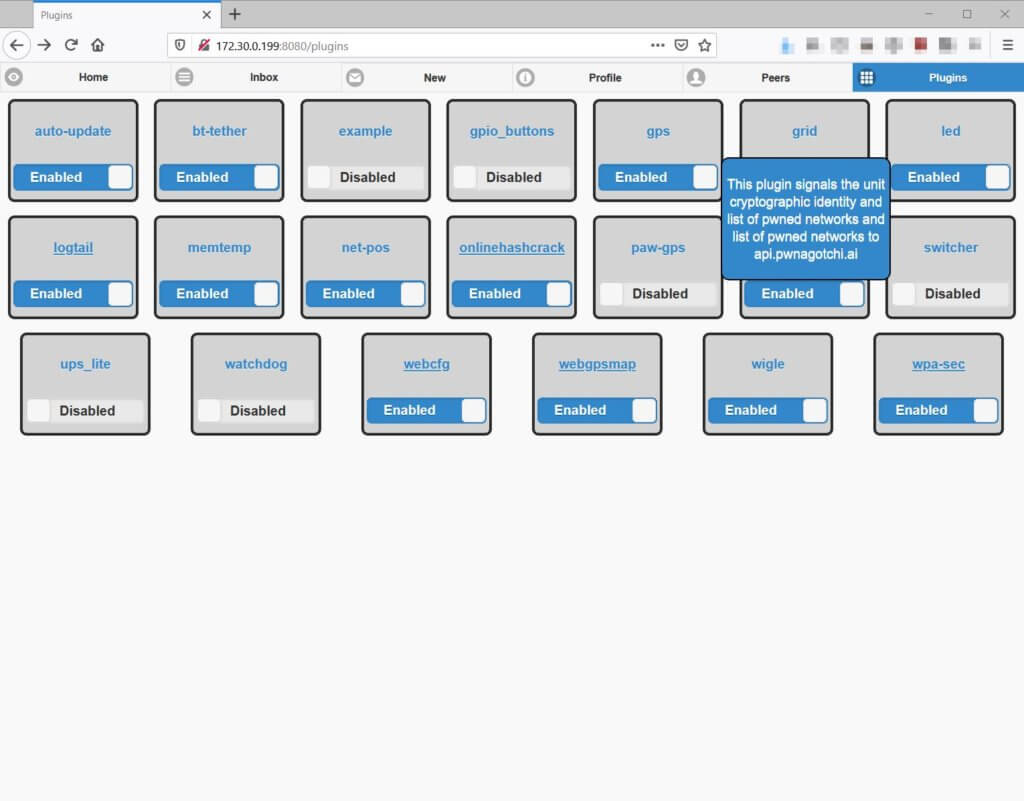
PSK Auditing Plugins
The pwnagotchi comes with a myriad of plugins of varying quality. The two most important ones I found two pwnagotchi plugins to enable are wpa-sec and OnlineHashCrack. The pwnagotchi can automatically upload the captured handshakes to these two online Wi-Fi handshake auditing services. If the Wi-Fi passphrase is simple enough, these two online services can reveal the wireless password within 24 hours.
First, enable the password-auditing plugins with the following:
# pwnagotchi plugins enable onlinehashcrack
# pwnagotchi plugins enable wpa-sec
OnlineHashCrack does not require a user account, but it still needs a valid email address to upload and the handshakes. You will need to enter this email address on OnlineHashCrack.com to access the results.
Add an email address by running:
# pwnagotchi plugins edit onlinehashcrack
Then your preferred email address should be added to the main.plugins.onlinehashcrack.email setting.
Similarly, wpa-sec requires an API key (obtained from here) to be added to main.plugins.wpa-sec.api_key:
# pwnagotchi plugins edit wpa-sec
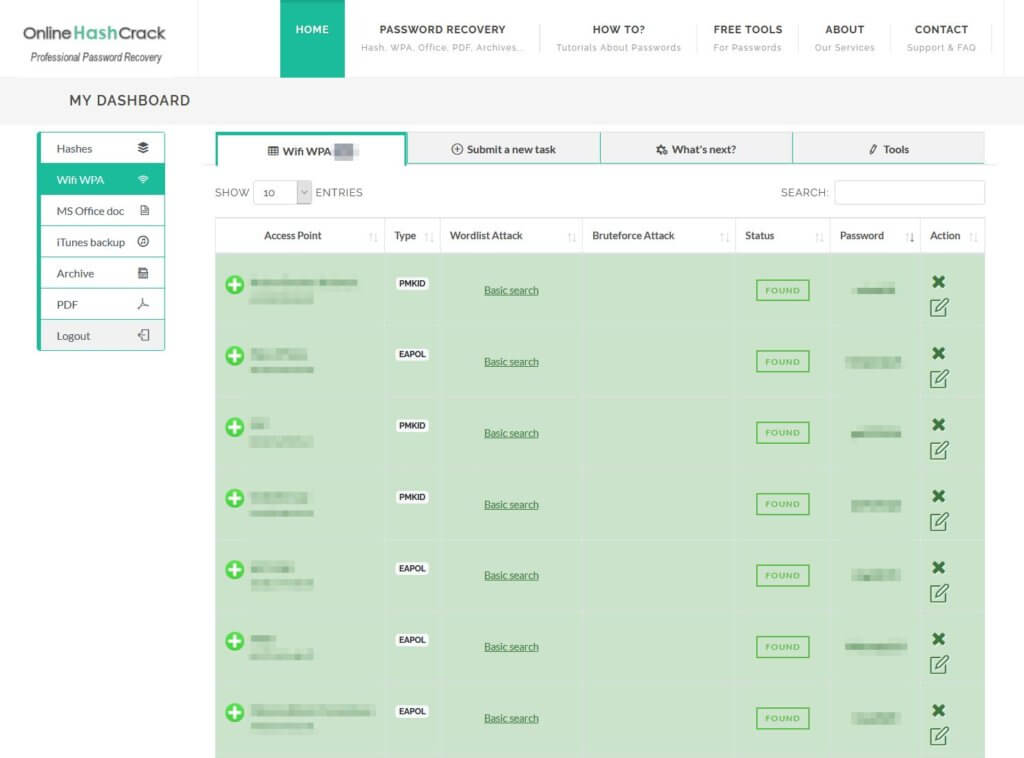
The Wi-Fi pre-shared key auditing results will be available at once the pwnagotchi starts uploading them:
The Wi-Fi handshakes are also available in /root/handshakes on the pwnagotchi device for offline cracking with the hashcat toolkit.
The Results
After two days of roaming around the National Convention Centre in Canberra, the little pwnagotchi managed to collect Wi-Fi handshakes from 430 different wireless access points. Due to various networking issues, about 160 handshakes were submitted to the OnlineHashCrack and wpa-sec handshake-auditor services.
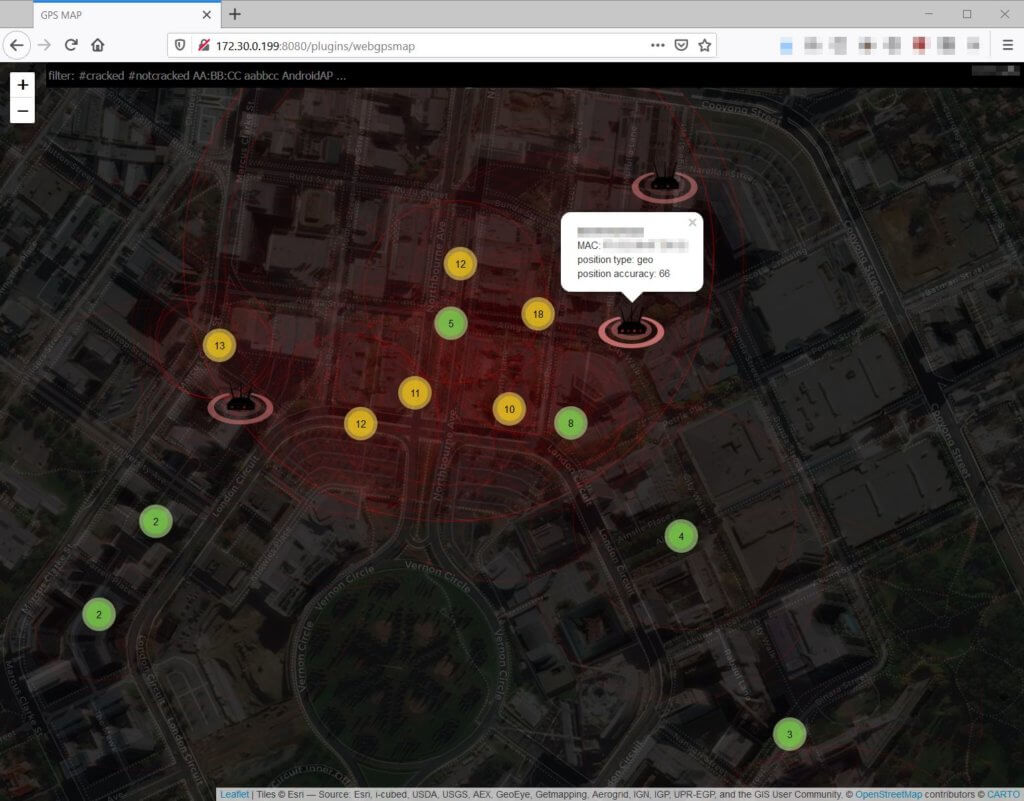
In the end, the two online services found 28 Wi-Fi access points with easily-guessable wireless passwords in the heart of Canberra.
Having seen the 28 weak passwords and their corresponding access points, I managed to draw the following conclusions:
- Disable the insecure Wi-Fi Protected Setup (WPS) feature on your router. The 8-digit-long numbers-only passwords are easy to guess. (10 wireless APs)
- If you have a pocket router, or a have the personal hotspot feature enabled on your phone, choose a strong password. (3 APs)
- If you have a POS machine for your restaurant business, ensure your private Wi-Fi is protected with a strong password. (2 APs)
- If you have a wireless access point for your office PCs, ensure it is either protected with a strong password or it relies on PKI-based authentication. (2 APs)
- If you are a wealthy individual, ensure your AP name is not named after yourself and your wireless password is not easily guessable. (1 AP)
Conclusion
Although Wi-Fi security is a well-researched, well-understood and over-communicated area, individuals and businesses both seem to configure Wi-Fi networks as it was still the early 2000s.
Without boring anyone to death by stating the obvious: WEP, WPA, weak PSKs are bad, while WPA2, WPA3 and strong passwords rule.
To secure your wifi network my practical advice is:
- Choose a strong password to protect your wireless network;
- Use WPA3 if available, and choose WPA3-compatible routers and devices;
- Use certificate-based wireless authentication if available;
- Disable the Wi-Fi Protected Setup (WPS) feature on your router;
- Name your wireless access points to hide their purpose (e.g. networks for Point-of-Sale systems);
- Hire a professional to secure your network if these things look complicated to you.
As for the pwnagotchi, it is still a fun project to tinker with despite the recent inactivity around its development. Once the small bug fixes are applied, the pwnagotchi just simply does its job as intended.